How to Make Granola: Homemade Granola Everyone Will Love
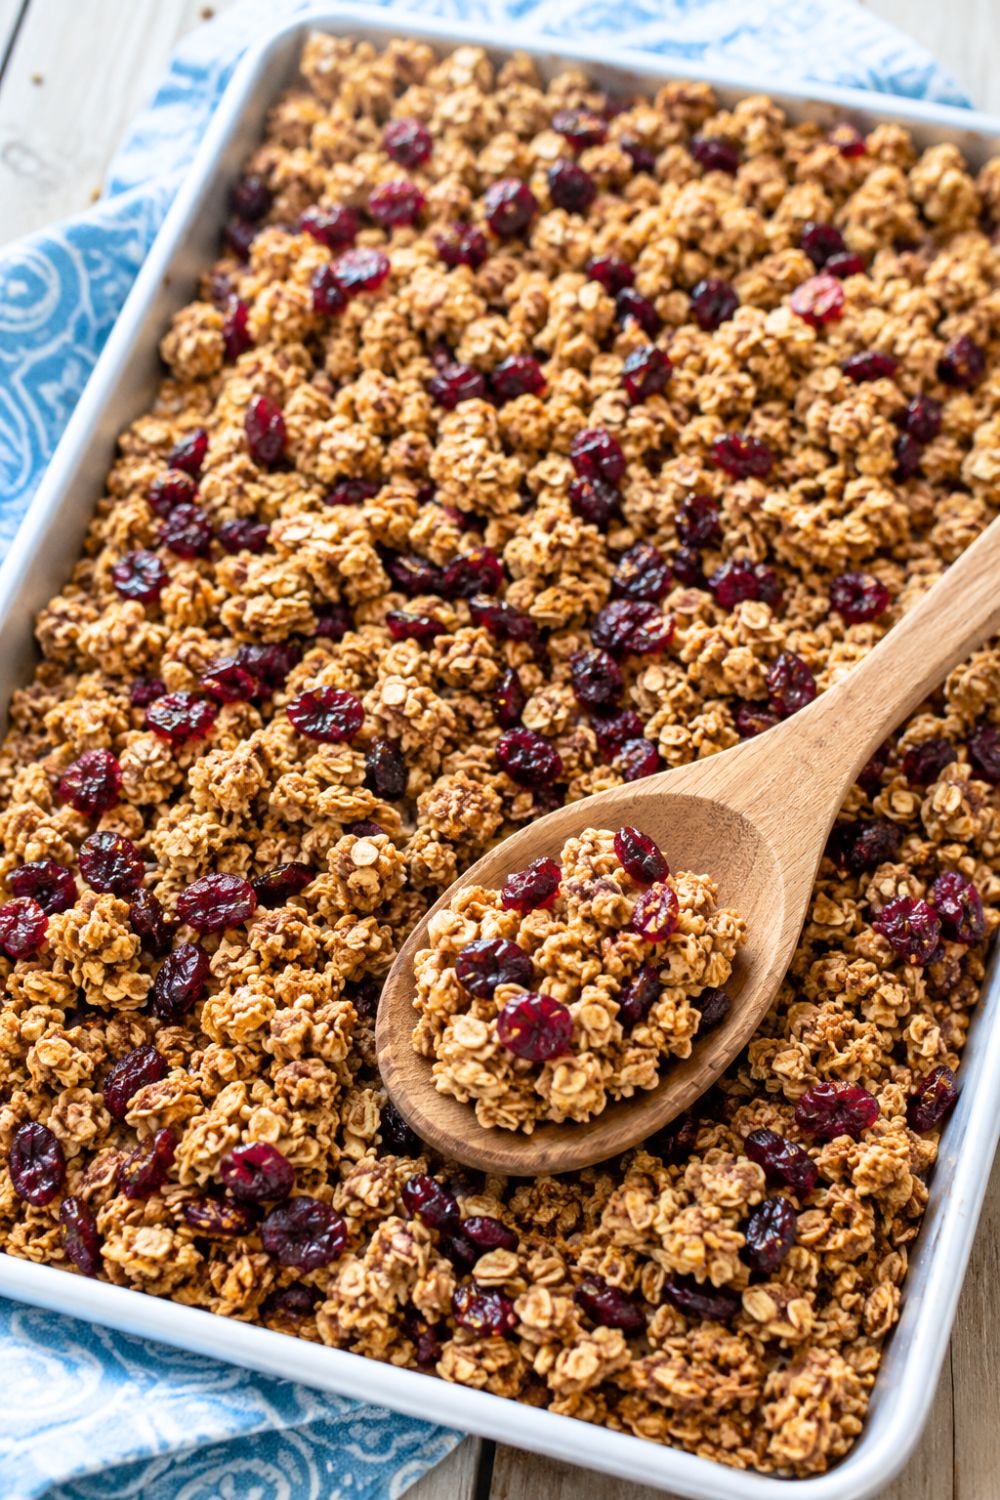
Homemade granola is one of those recipes I find myself making again and again because it’s simple, budget-friendly, and tastes so much better than anything from the grocery store. There’s nothing quite like pulling a warm pan of golden, crunchy granola from the oven, filling the kitchen with the cozy aroma of toasted oats, cinnamon, and honey. Whether you sprinkle it over yogurt, enjoy it with milk for breakfast, or grab a handful for an afternoon snack, this easy homemade granola is endlessly customizable and always a favorite. Once you see how easy it is to make, you’ll wonder why you didn’t start sooner.
Scroll to the bottom to print the recipe.
More recipes:
- How to Make Chocolate Chip Cookies: Tips, Tricks, and Secrets for Better Homemade Cookies
- 22 Sourdough Discard Recipes You Simply Have to Try!
- Focaccia Bread Recipes and Beginner Guide to Baking Focaccia at Home
- Loaded Beef Nacho Fries Everyone Will Love

Affiliate links may be used in this post, and if so, I will receive a commission at no extra cost. I’m also part of the Amazon Affiliate (Associate) program, where I earn a commission from sales made through my affiliate links. Read the full disclosure policy.
Get our free lunch recipes list!
When you join our newsletter
Note from Nell
Homemade granola has become one of those recipes I make without even thinking about it. I almost always have a jar sitting on my kitchen counter because it’s such an easy way to make breakfast or snack time feel a little more special. I love sprinkling it over yogurt with fresh fruit, adding it to smoothie bowls, or simply enjoying a handful with my afternoon coffee.
One of my favorite things about making granola at home is that you get to control exactly what goes into it. You can add your favorite nuts, seeds, dried fruit, or even a handful of chocolate chips once it has cooled. Every batch turns out a little different, and that’s part of the fun. I hope this recipe becomes one you come back to whenever you want something simple, cozy, and delicious.
Why You’ll Love This Homemade Granola
- Easy to make: You only need a few simple steps and about 10 minutes of prep before the oven does the rest of the work.
- Made with pantry staples: Most of the ingredients are everyday kitchen essentials like rolled oats, honey, cinnamon, vanilla, and your favorite nuts or seeds.
- Less expensive than store-bought: Making granola at home is a budget-friendly way to enjoy a high-quality breakfast or snack without paying premium grocery store prices.
- Perfectly crunchy: Baking it low and slow creates those golden, crisp clusters that make homemade granola so satisfying.
- Easy to customize: Mix and match your favorite nuts, seeds, dried fruit, coconut, or even chocolate chips to create a batch that’s completely your own.
- Great for meal prep: Make one batch and enjoy it throughout the week for quick breakfasts, healthy snacks, or an easy topping for yogurt and smoothie bowls.
Ingredients
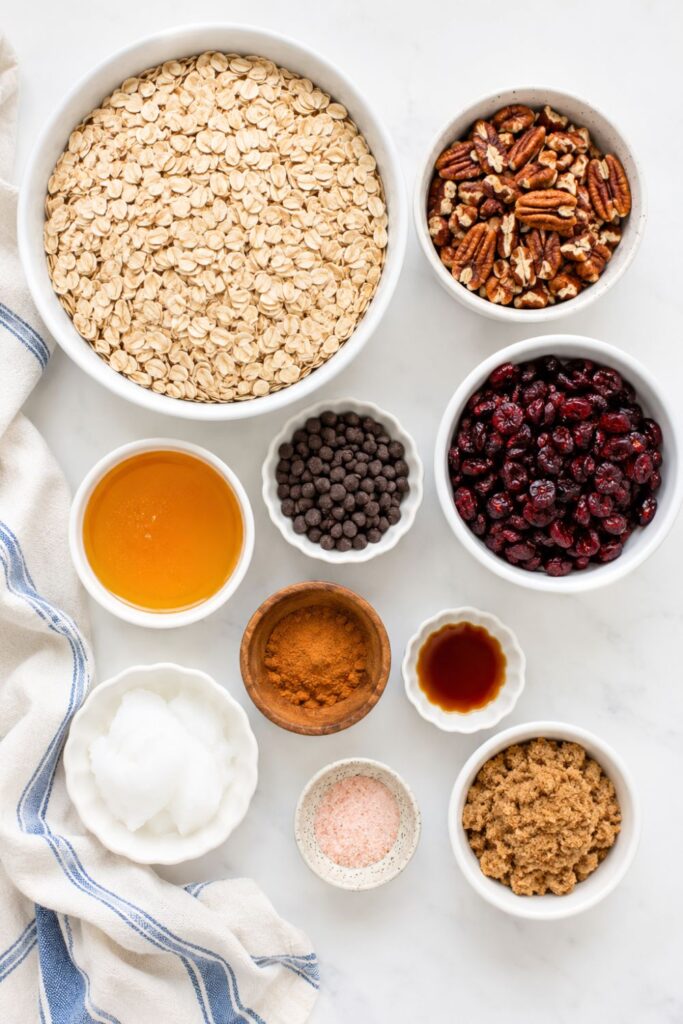
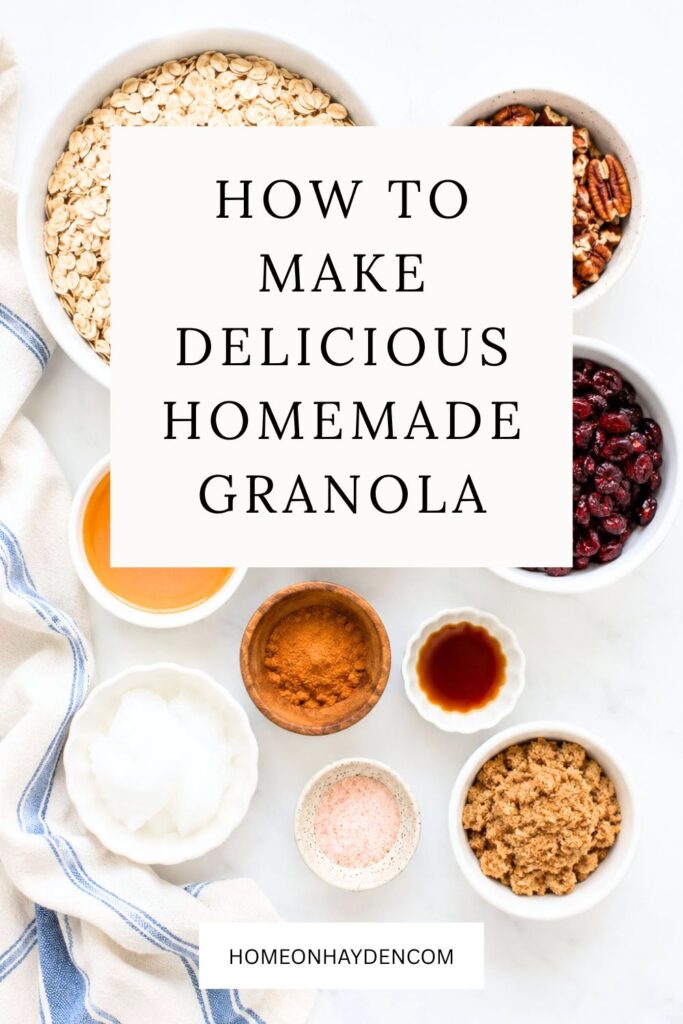
You’ll only need a handful of simple ingredients to make a delicious batch of homemade granola. Most of these are pantry staples, making this an easy recipe to whip up whenever you’re craving a crunchy breakfast or snack.
- Old-Fashioned Rolled Oats: The base of every great granola recipe. Rolled oats bake up with the perfect hearty texture and create those irresistible crunchy clusters.
- Chopped Pecans: Add a rich, buttery crunch that pairs beautifully with the warm flavors of cinnamon and honey. Feel free to substitute walnuts, almonds, or your favorite nut.
- Honey: Naturally sweetens the granola while helping all of the ingredients stick together to form delicious clusters.
- Coconut Oil: Adds richness and helps the granola crisp up beautifully in the oven. Melted butter is another delicious option if you prefer.
- Vanilla Extract: Brings a warm, cozy flavor that ties all of the ingredients together.
- Ground Cinnamon: Adds a hint of spice and gives the granola that classic homemade flavor everyone loves.
- Salt: Just a small amount balances the sweetness and enhances the overall flavor.
Optional Add-Ins
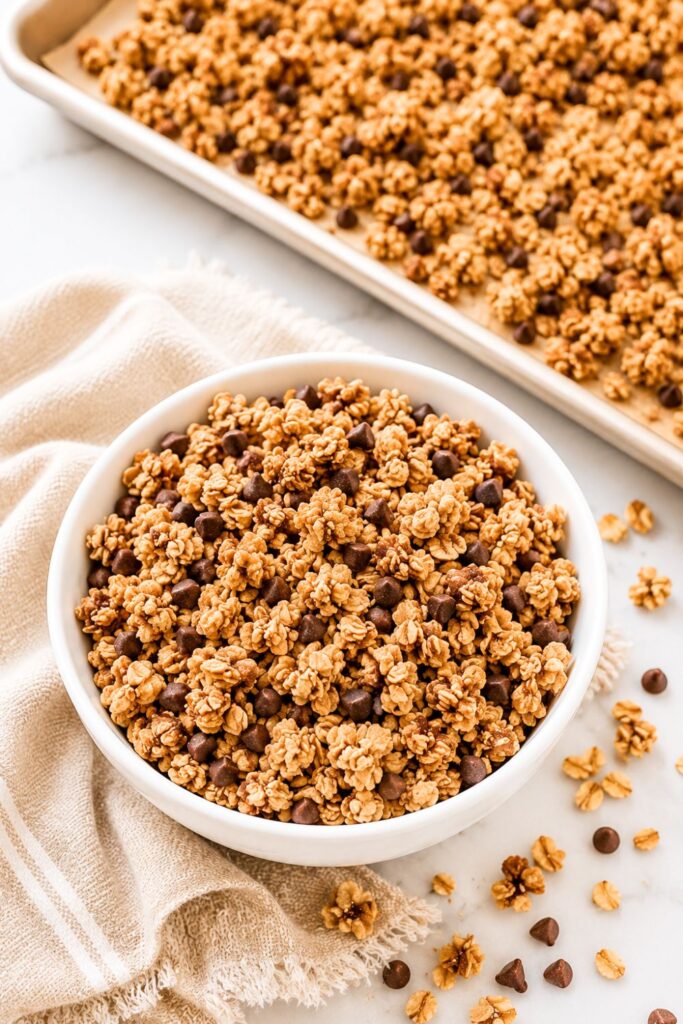
Once the granola has completely cooled, stir in any of your favorite mix-ins to make it your own.
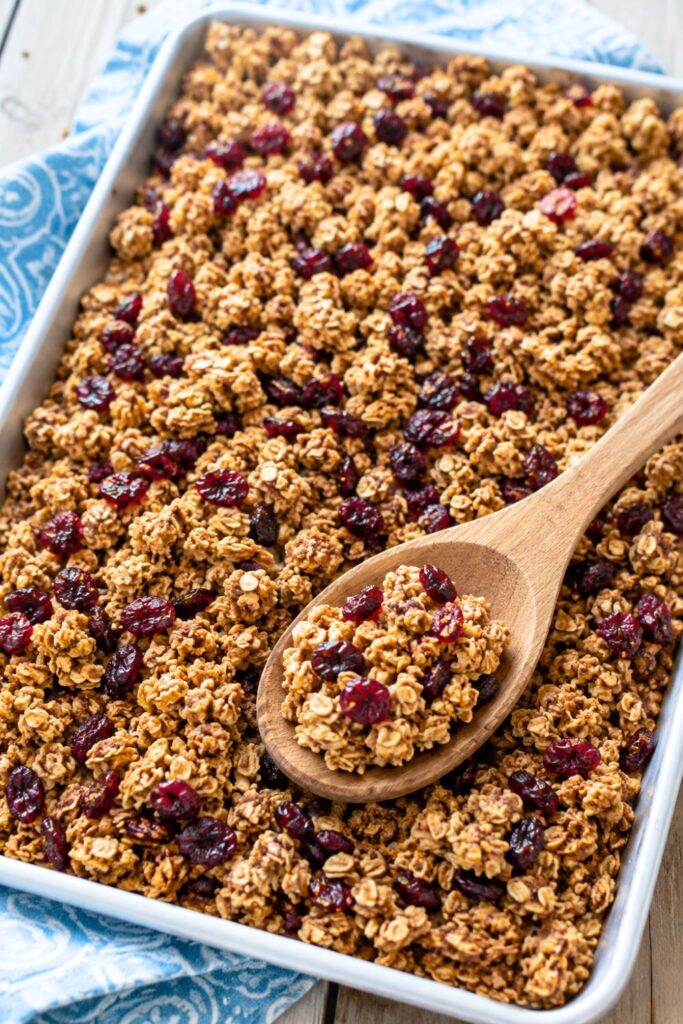
- Dried cranberries or raisins
- Chopped dried apricots
- Coconut flakes
- Pumpkin seeds
- Sunflower seeds
- Chia seeds
- Ground flaxseed
- Mini chocolate chips
- White chocolate chips
- Freeze-dried strawberries or blueberries
Equipment You’ll Need
- Large mixing bowl
- Measuring cups and spoons
- Baking sheet
- Parchment paper
- Spatula or wooden spoon
- Airtight storage container
How to Make Homemade Granola
Making homemade granola couldn’t be much easier. With just a few minutes of prep and a little time in the oven, you’ll have a golden, crunchy batch that’s perfect for breakfast or snacking.
Step 1: Preheat the Oven
Preheat your oven to 325°F (163°C). Line a large baking sheet with parchment paper to prevent sticking and make cleanup quick and easy.
Step 2: Mix the Dry Ingredients
In a large mixing bowl, combine the rolled oats, chopped pecans, ground cinnamon, and salt. Stir everything together until the ingredients are evenly distributed.
Step 3: Combine the Wet Ingredients
In a small bowl or measuring cup, whisk together the honey, melted coconut oil, and vanilla extract until smooth and well blended.
Step 4: Coat the Oats
Pour the wet mixture over the oat mixture. Stir well until every oat and nut is lightly coated with the honey mixture.
Step 5: Spread onto the Baking Sheet
Transfer the granola to the prepared baking sheet and spread it into an even layer. Gently press it down with the back of a spatula if you’d like larger crunchy clusters.
Step 6: Bake
Bake for 25 to 30 minutes, stirring once about halfway through, until the granola is lightly golden brown and smells wonderfully toasted. Keep an eye on it during the last few minutes since it can brown quickly.
Step 7: Cool Completely
Remove the baking sheet from the oven and let the granola cool completely without stirring. This is the secret to getting those delicious crunchy clusters.
Step 8: Add Optional Mix-Ins
Once the granola has cooled, gently stir in any dried fruit, chocolate chips, coconut flakes, or other favorite add-ins.
Step 9: Store and Enjoy
Transfer the granola to an airtight container or glass jar. Enjoy it over yogurt, with milk, sprinkled on smoothie bowls, or by the handful whenever you need a quick snack.
Tips for the Best Homemade Granola
A few simple tricks can make the difference between good granola and a batch that’s perfectly golden, crunchy, and packed with flavor. Keep these tips in mind every time you make it.
Use Old-Fashioned Rolled Oats
Rolled oats create the best texture for homemade granola. Quick oats can become too soft, while steel-cut oats won’t cook properly in this recipe.
Don’t Skip the Parchment Paper
Lining your baking sheet with parchment paper helps prevent sticking and makes cleanup much easier. It also helps the granola bake more evenly.
Spread It into an Even Layer
Try to keep the granola in one even layer across the baking sheet. This allows everything to toast evenly and helps prevent some pieces from burning while others stay undercooked.
Press It Down for Bigger Clusters
If you love chunky granola, gently press the mixture down with the back of a spatula before baking. The oats will stick together as they bake and cool.
Stir Only Once
Resist the urge to stir the granola too often. Stirring once about halfway through baking is usually enough to help it brown evenly while still allowing clusters to form.
Let It Cool Completely
This is one of the most important steps. The granola continues to crisp up as it cools, so avoid stirring or breaking it apart until it has completely cooled on the baking sheet.
Watch It Near the End
Granola can go from perfectly toasted to overbaked fairly quickly. Start checking it during the last few minutes of baking and remove it once it’s lightly golden.
Add Delicate Ingredients After Baking
Chocolate chips, dried fruit, and freeze-dried fruit should always be stirred in after the granola has cooled. Adding them before baking can cause them to burn or melt.
Store It Properly
Keep your granola in an airtight container or glass jar at room temperature. Properly stored, it will stay fresh and crunchy for up to two weeks.
Make It Your Own
One of the best things about homemade granola is how easy it is to customize. Try different nuts, seeds, spices, or dried fruits to create a new favorite combination every time you bake a batch.
Fun Variations
One of my favorite things about homemade granola is how easy it is to switch up the flavors. Start with the base recipe, then mix in a few extra ingredients to create a completely new batch every time. Here are some delicious ideas to inspire your next pan of granola.
Peanut Butter Granola
If you’re a peanut butter lover, this version is hard to beat. Replace some of the coconut oil with natural peanut butter and stir it into the wet ingredients before mixing everything together. Once the granola has cooled, toss in a handful of peanut butter chips or roasted peanuts for even more flavor.
Chocolate Granola
Turn your breakfast into a little treat by adding unsweetened cocoa powder to the oat mixture before baking. After the granola has cooled completely, stir in mini chocolate chips, dark chocolate chunks, or cacao nibs. It’s especially delicious sprinkled over vanilla yogurt.
Pumpkin Spice Granola
This cozy version is perfect for fall mornings. Add pumpkin pie spice along with the cinnamon, and mix a few tablespoons of pumpkin puree into the wet ingredients if you’d like even more autumn flavor. Finish with roasted pumpkin seeds and dried cranberries after baking.
Maple Pecan Granola
Swap the honey for pure maple syrup to give your granola a rich, cozy sweetness. Pecans pair perfectly with the maple flavor, creating a crunchy granola that’s wonderful with yogurt or a bowl of cold milk.
Coconut Almond Granola
For a tropical-inspired crunch, add sliced almonds and unsweetened coconut flakes. Stir the coconut into the granola during the last few minutes of baking so it becomes lightly toasted without burning. A splash of almond extract also adds wonderful flavor.
Cranberry Walnut Granola
Walnuts add a slightly earthy crunch that pairs beautifully with sweet dried cranberries. Once the granola has cooled, stir in the cranberries for a colorful, slightly tart bite that’s perfect during the holiday season but delicious all year long.
Apple Cinnamon Granola
This variation tastes like apple pie in breakfast form. Increase the cinnamon slightly and stir chopped dried apples into the cooled granola. A small pinch of nutmeg or apple pie spice adds even more warm, comforting flavor.
Tropical Granola
Bring vacation vibes to your breakfast by mixing in toasted coconut, dried pineapple, dried mango, and macadamia nuts. Serve it over coconut yogurt or with fresh fruit for a bright and refreshing start to the day.
What to Serve with Homemade Granola
Homemade granola is incredibly versatile, which is one of the reasons I love making a batch to keep on hand. Whether you’re looking for a quick breakfast, an afternoon snack, or even a simple dessert topping, there are so many delicious ways to enjoy it.
Yogurt Parfaits
Layer creamy Greek yogurt with homemade granola and fresh berries for an easy breakfast or snack that’s both satisfying and packed with protein.
Smoothie Bowls
Sprinkle a generous handful of granola over your favorite smoothie bowl for extra crunch and texture. It pairs especially well with strawberry, blueberry, mango, or tropical smoothies.
A Bowl with Milk
Sometimes the simplest option is the best one. Pour your favorite milk over a bowl of homemade granola for a quick breakfast that’s every bit as comforting as your favorite cereal.
Fresh Fruit
Serve granola alongside sliced bananas, strawberries, peaches, apples, blueberries, or raspberries. The fresh fruit adds natural sweetness and balances the crunchy texture perfectly.
Cottage Cheese
If you’re looking for a protein-packed breakfast or snack, top a bowl of cottage cheese with granola and fresh fruit. The combination of creamy and crunchy is surprisingly delicious.
Oatmeal
Add a sprinkle of granola to a warm bowl of oatmeal for extra texture and flavor. It gives your morning oats a satisfying crunch with every bite.
Ice Cream
Homemade granola also makes a wonderful dessert topping. Sprinkle it over vanilla ice cream or frozen yogurt for a little crunch that tastes like a bakery-style treat.
Acai Bowls
Top homemade acai bowls with granola, fresh fruit, coconut flakes, and a drizzle of honey for a colorful breakfast that’s as beautiful as it is delicious.
Overnight Oats
Stir your overnight oats together the night before, then add a handful of granola just before serving. This keeps the granola crisp while adding wonderful texture.
By the Handful
Don’t overlook the simplest option! Homemade granola makes a fantastic grab-and-go snack straight from the jar. It’s perfect for busy mornings, road trips, lunchboxes, or whenever you need a quick bite between meals.
Frequently Asked Questions
How long does homemade granola last?
When stored in an airtight container or glass jar at room temperature, homemade granola will stay fresh for about 2 to 3 weeks. For the best crunch, keep it in a cool, dry place away from moisture and direct sunlight.
Can I freeze granola?
Yes! Homemade granola freezes beautifully. Place it in a freezer-safe bag or airtight container and freeze for up to 3 months. When you’re ready to enjoy it, let it come to room temperature for a few minutes before serving. It usually stays nice and crunchy without needing to be reheated.
Why isn’t my granola crunchy?
There are a few reasons your granola may not have turned out as crunchy as you hoped. It may have needed a little more baking time, or it may not have cooled completely before being stirred. Granola actually crisps up as it cools, so letting it sit undisturbed on the baking sheet is one of the most important steps. Also, make sure you’re using rolled oats rather than quick oats for the best texture.
Can I use quick oats?
You can, but I don’t recommend it if you’re looking for classic crunchy granola. Quick oats are thinner and tend to bake up softer, resulting in a finer texture. Old-fashioned rolled oats hold their shape much better and create those delicious crunchy clusters that homemade granola is known for.
Can I make it gluten-free?
Absolutely! Simply use certified gluten-free rolled oats and double-check that any add-ins, such as chocolate chips or dried fruit, are also certified gluten-free if needed. The rest of the ingredients are naturally gluten-free in most cases, but it’s always a good idea to read the labels.
Can I make it without nuts?
Of course! If you have a nut allergy or simply prefer nut-free granola, just leave the nuts out. You can replace them with sunflower seeds, pumpkin seeds, hemp hearts, or extra rolled oats for plenty of crunch and texture. The granola will still be delicious and satisfying.
Storage Tips
One of the best things about homemade granola is that it stores wonderfully, making it perfect for meal prep. As long as it’s kept in the right container, you’ll have a crunchy breakfast or snack ready whenever you need it.
Let It Cool Completely
Before storing your granola, make sure it has cooled completely on the baking sheet. Storing it while it’s still warm can trap moisture, causing the granola to lose its crunch.
Use an Airtight Container
Store your granola in an airtight container, glass jar, or resealable storage bag. Keeping air and moisture out helps it stay fresh and crisp.
Keep It at Room Temperature
Homemade granola is best stored in a cool, dry pantry or cupboard. Avoid storing it near the stove or other warm, humid areas of the kitchen.
Freeze for Longer Storage
If you’ve made a large batch, freeze part of it in a freezer-safe container or zip-top bag for up to 3 months. Simply thaw it at room temperature when you’re ready to enjoy it.
Label the Date
If you make granola often, it’s helpful to label the container with the date you made it. Homemade granola tastes best when enjoyed within 2 to 3 weeks.
Final Thoughts
Once you make homemade granola from scratch, it’s hard to go back to the store-bought version. It’s incredibly easy to prepare, made with simple ingredients, and can be customized in so many different ways to fit your family’s tastes. Whether you enjoy it over yogurt, poured into a bowl with milk, sprinkled on smoothie bowls, or simply by the handful, it’s one of those recipes you’ll find yourself making again and again.
I hope this recipe becomes a staple in your kitchen just like it has in mine. Don’t be afraid to experiment with different nuts, seeds, spices, and dried fruits to create your own favorite combination. Happy baking, and enjoy every crunchy bite!
Homemade Granola Recipe
Ingredients
Method
- Preheat the oven to 325°F (163°C). Line a large rimmed baking sheet with parchment paper.
- Mix the dry ingredients. In a large mixing bowl, combine the rolled oats, chopped pecans, cinnamon, and salt.
- Mix the wet ingredients. In a separate small bowl or measuring cup, whisk together the honey, melted coconut oil, and vanilla extract until smooth.
- Combine everything. Pour the honey mixture over the oat mixture and stir until all of the oats and pecans are evenly coated.
- Spread onto the baking sheet. Transfer the mixture to the prepared baking sheet and spread it into an even layer. Gently press it down with the back of a spatula if you'd like larger granola clusters.
- Bake for 25–30 minutes, stirring once halfway through, until the granola is lightly golden brown and fragrant. Keep an eye on it during the last few minutes to prevent over-browning.
- Cool completely. Remove the baking sheet from the oven and let the granola cool completely without stirring. As it cools, it will become crisp and develop crunchy clusters.
- Add optional mix-ins. Once the granola has cooled, stir in any desired add-ins such as dried cranberries, chocolate chips, coconut flakes, or seeds.
- Store and enjoy. Transfer the granola to an airtight container or glass jar. Enjoy it with yogurt, milk, smoothie bowls, fresh fruit, or simply by the handful as a snack.
Notes
Recipe Notes
- Use old-fashioned rolled oats for the best texture. Quick oats won’t give you the same crunchy clusters, and steel-cut oats won’t cook properly in this recipe.
- For bigger granola clusters, press the mixture firmly into an even layer before baking and avoid stirring more than once. Let the granola cool completely before breaking it apart.
- Don’t overbake. Granola continues to crisp up as it cools, so remove it from the oven when it’s lightly golden rather than dark brown.
- Customize it! Swap the pecans for walnuts, almonds, cashews, or your favorite nuts. You can also add pumpkin seeds, sunflower seeds, flaxseed, or chia seeds for extra nutrition.
- Add dried fruit and chocolate after baking. Stir in ingredients like dried cranberries, raisins, coconut flakes, or chocolate chips only after the granola has completely cooled.
- Storage: Keep granola in an airtight container at room temperature for up to 3 weeks, or freeze it for up to 3 months.
- Serving Ideas: Enjoy with milk like cereal, sprinkle over yogurt or smoothie bowls, top oatmeal, or simply eat it by the handful for an easy snack.